Friday, July 27, 2012

2012 Summer Olympics


The opening ceremonies for the 2012 Olympics are tonight. Aren't you excited?  The summer games are so much fun! 

Go America

Enjoy the games!

Happy Olympics!
~Trina


Wednesday, July 25, 2012

7 Tips for Hanging a Gallery Wall and 5 Walls that You are Sure to Love


I love gallery walls. LOVE! 
I have three in my house and am working on a fourth.
Can you say obssessed? 

I'm glad my hubby just rolls with it when I get ready to make another one!

Tuesday, July 24, 2012

Teaching Tuesday:
How to get your child to write over summer vacation


Being a teacher I always worry about my students over the summer.  I know that they are not reading (at least not as much as they should) and that causes the backward slide when September rolls around. Then we play catch up for the first month before we can actually move forward. It is frustrating to say the least.

So, now that I have a child who is in school (B-Bear is going into 1st grade) I knew I had to do something to continue his reading and writing practice over the summer.

This is what we did...
First we bought a super cool notebook together.


Then I started with a letter to my dear son. I made sure to use words that he could read easily. I also ask a couple questions, so that he would have something to write about back to me.

B's writing at the beginning of the summer.

Here is the best part...or at least B. thinks so. When the letter is finished the writer puts it under the pillow of the other person. A little surprise to find later.

So we started this and at first, B. protested. He didn't want to write or when he wrote I needed to sit with him and help him. I knew this would happen too...come on, he is a boy after all. 

Write instead of ride my bike, jeez, mom!

A few Miner adjustments....we write at bedtime to avoid missing out on any outdoor fun and to avoid any arguments.

Now, a couple weeks in he is asking me to leave when he writes.  That is progress! It is just as much fun for me to get a letter as it is for him to get one.


And I have changed it up a little on a couple letters.  Instead of having him write a response to me, I will have him practice spelling some sight words that he is having trouble with or have him make a list or draw a picture.

Someday, we will look back at this together and get a laugh out of the misspellings and pictures and I know that I will get choked up thinking about the little boy that he once was.

Look how much he has improved just after a few weeks!
Don't you just love the way he spelled "friends"?


PS...Here are some other ideas for writing with your kids

1. Make grocery lists.
2. Keep track of all the books you have read together and hang it up.
3. Write postcards to grandparents.
4. Practice sight words with chalk on the driveway.


Happy Writing!
~Trina

Friday, July 20, 2012

It's my party and...

I won't cry, but I am not...I repeat...I am not turning 36.  We'll call it 35 and holding or how about 29 again...that is even better.  And I am not changing ages because now I am on the down hill slope to 40.  And we all know how fast time goes when you are facing the down hill.  


Funny Birthday Ecard: Happy Anniversary of Your 29th Birthday.

So today, while I have the privilege of celebrating my day (I love this day...not the number), I will leave you with a few of my favorite birthday pins and a couple of pictures of my past birthday celebrations.

2011


Hello and Happy Birthday!!! 
stylish correspondence


2009


1997 - My 21st birthday with mom and dad...those were the days.
My dad is such a goof!


source unknown


And if it is your birthday today as well...
Have an amazing day full of love, laughter and maybe a present or 2!

Happy Day!
~Trina

Tuesday, July 17, 2012

Pottery Barn Inspired Wall Art

This red and khaki wall was so 2001.

I was over it and ready for something lighter and brighter. The giant star had to go too.

My hubby didn't want me to change it. I think he was just afraid I would enlist him to help.

But alas, I did it while he was at work and he never had to lift a finger. You're welcome, my love!


With the red gone {it took 4 coats...jeez}, the room all crisp and white and the star out of the house {what the heck am I going to do with it anyway}, I had to figure out what to do with that space.

In our garage there was a giant piece (35" x 48") of lue-on (loo-on? lew-in? lew-on...I have no idea how to spell it and neither does spell check).  

It was the perfect size and with a few Miner adjustments I knew it would be perfect for the wall.

I got my inspiration from Pottery Barn.  Don't we all?  I saw 3 vintage flashcards that were framed and cost $100 for the set. (Thanks, Beckie for finding this image).

Sunday, July 15, 2012

It’s Magic, Magic…


We have been busy working through our Summer Bucket List. We've actually done 14 things on the list so far...pretty ambitious.

Last night we needed a little project for the boys who were tired from swimming all day and crabby/ fighting with each other.  Do you know those days where they are perfect angels one minute and little devils the next or am I the only one? That is for another blog post, I guess.

So we made Hocus Pocus Rolls.  Why the Hocus Pocus? We heard they are magical. Really? Magical food? Let's find out.

You need:
One can of crescent rolls
One marshmallow for each roll
Cinnamon sugar
Melted Butter
Wax paper and a baking tray
A cute assistant or two


Get your very cute assistant to count out the marshmallows and hope that he doesn't lick any of them. Preheat oven to 350.


Roll the marshmallows in the melted butter. Then roll them in the cinnamon sugar.


Wrap the marshmallow in the crescent roll, pinching the dough together securely.


When all crescents are rolled they will look like this...


Bake them for 12 minutes. And then Hocus Pocus...the marshmallow disappears! How? Where does it go?


And boy oh boy...they are tasty! Amazingly, there wasn't any marshmallow taste at all.


One Miner adjustment that we would have made is to roll out the crescent roll a little, so that there are more dough to pinch around the marshmallow. On some of the rolls the pinch wasn't tight enough, so a little marshmallow ran out onto the baking tray. What was left inside did disappear though. Weird!

Happy Magic!
~Trina


Tuesday, July 10, 2012

Visitors!


So excited! My parents are coming today!  We haven't seen them since the beginning of May.
Unfortunately, we live 4 hours apart.  The kids get so excited to see them!  And my mom is staying for 9 days! 

So I might be M.I.A. for a little while.  But we have projects to do and places to visit, so I will hopefully have some good ideas for you!  Have a great week!


This is one excited boy!

~Trina

Monday, July 9, 2012

Making a Blog Button using a Photograph

Shrink it, Shrink it Real Good

I am so thrilled with myself. I have to toot my own horn. "Toot Toot!" I just created my own blog button (it's on the sidebar to the right)! I consider myself pretty tech savy, but when it comes to HTML, I have no clue. And I am sure that to a lot of you, like me, it is a foreign language.  But I was determined to make my own blog button.  So I googled "How to Make a Blog Button for Blogger."

And these easy steps came up from WikiHowIt includes the code that you will need for the button.  Phew! I didn't have to think about that!

So if the instructions are all right there on  WikiHow , why am I blogging about this?

I needed a picture and I have no clue how to make graphics, so I decided to use a family photo that I love.

But it needs to be shrunk down to 125 x 125 in order to fit.  How do I do that? I don't have Photoshop

So I went to my favorite FREE photo editing site PicMonkey

Here are the steps to making a few Miner adjustments to your picture.

Image taken by Ashley Brown Photography

Step 1:
Click on EDIT A PHOTO. Upload the photo you want to use.

Step 2:
Crop the photo to your liking.

Step3:
Click on RESIZE and type in 125 x 125 and save. (Shrink it! Shrink it real good).

Step 4:
Then you can have fun....to the far left side there are icons that help you add text or frames or color. 

Step 5:
Save this to your desktop or somewhere easy to find on your computer.

Step 6:
Upload this photo to photobucket (This is a step from the WikiHow article).
You will have to make an account if you don't already have one. It is totally worth it.  I tried using picassa web albums and Shutterfly, but neither of them worked for this.

Step 7:
Once you have uploaded this new photo to photobucket, click SHARE.
Then click on GET LINK CODE.

STEP 8:
For the code under HTML for "websites and blogs", right click and copy the code for FULL SIZE.

This is the web address you will put in the HTML code from the WikiHow article.

Follow the wikihow steps precisely and you will have a created a blog button! What an amazing feeling of accomplishment!


Hopefully, I just saved you 2 hours!


{Trina}

Sunday, July 8, 2012

12 Today


12 years ago on this day I said, "I do."
12 years ago on this day I said, "I will."
12 years ago on this day I said, "Yes."
Forever.


I still mean it....no Miner adjustments.


Happy Anniversary, Baby!

Love, Trina


Thursday, July 5, 2012

A Pop of Color

I have been hearing "add a pop of color" since the days of Trading Spaces.  Remember that show...oh how I loved Ty Pennington (sigh).

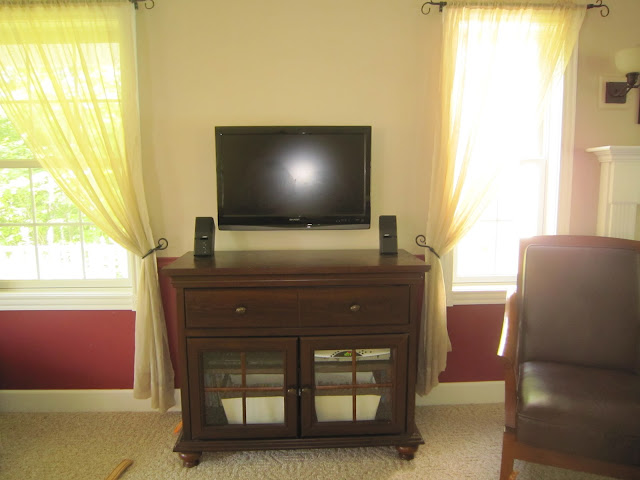
Last summer, I repainted the living room and I was looking for a dresser to use under my TV.  

{Who says a dresser should only be in a bedroom?} This piece was too heavy and dark. 


Tuesday, July 3, 2012


Happy Red, White, and Blue!


Did you know that the first Independence Day was actually celebrated on July 8th?  The 4th was actually the day that the Declaration of Independence was adopted.

Then in 1941, Congress declared 4th of July a federal legal holiday. It is one of the few federal holidays that have not been moved to the nearest Friday or Monday.


I hope that you all have a fun, relaxing day off!

Happy Freedom Day!
~Trina


Project: Fun-oodle Target


I love fun-oodles!  They scream, “Let’s play in the pool!” (Well, they don't scream that. If you ever find a fun-oodle that screams...call me!) So I decided to make a little project that I found online, with a few Miner adjustments and it only cost $10!

What you need
6 Fun-oodles
Cardboard (I bet you could find a pizza box in the recycling that would work)
Duct Tape (there are really great colors out there)
Dowel Rods that fit in the noodle holes


Step 1
Cut up some cardboard and fit it into the end of one noodle.


Get a cute assistant
Step 2
Fit the other end of the noodle over the cardboard that is sticking out.


Step 3
Fit the noodle ends together and tape it closed with the tape.


Step 4
Repeat steps 1-3 for 3 more noodles.


Step 5
Line up the tape for each round noodle and then tape them together


Step 6
Take the 2 remaining noodles and tape them to the outer edges of the round noodles to make the poles. 


Step 7
Put dowel rods into the holes of the pole noodles and stick them into the ground for target practice!

Target game shot


Unfortunately it has been rainy here, so we haven't had a chance to set it up yet. We have used it in the house with our dart guns though...super fun! Can't wait to get playing with it outside!


Happy Target Practice!
~Trina


Sunday, July 1, 2012


Our Summer Bucket List


The boys and I made a summer list a couple weeks ago to keep us motivated for our vacation.  No mushy brains here!

I wonder how many things we can get accomplished on this ambitious list. I added some things that they didn't put on…just a few Miner adjustments.  Shh, don’t tell them.

What is on your to do list for this glorious summer?

~Trina


Summer to Do

Go on a canoe ride in Lake George
Visit the library every week
Read 100 books
Go to the beach 
Go camping
Build a birdhouse and paint it red and blue
Go to the playground
Watch a little TV 
Wash the cars
Get ice cream / M&Ms
Take swimming lessons
Go to Karate
Make an obstacle course
Make projects
Learn how to cook
Swing really high on the swings
Water balloon war 
Have a backyard campfire with s’mores
Family bike ride on the bike path
Write letters to my grandma 
Playdates
Open bank accounts with the kids
Go to the Big Apple Circus
 Celebrate birthdays
Take walks


Monkey in his pjs at Lake George


Update #2: As of August 10th...all items on the list that are crossed off have been accomplished...with joy!

Update: As of July 14th...all items on the list that are crossed off have been accomplished or in the process.


Pin It button on image hover